


Wood Stain Information
Littlefair’s Wood Stains are specially developed for indoor use, formulated to add rich and lasting colour while allowing the natural grain to shine through. This page will guide you through preparing the wood for staining, and explore our range of finishing products to help you find the ideal way to complete your project.
If you're unsure about the best way to apply our products, our FAQs & Help Centre provide detailed advice. You can also use the support tool in the bottom corner of this website to find relevant information.
If you need further assistance, feel free to email hello@woodfinishingproducts.com or call our customer service team on 01254 366130.
Choose a language to download PDF instructions


Preparation
Careful, thorough preparation will result in a far superior finish.
Ensure the wood is as clean as possible and free from previous paints, coatings and finishes. Well sanded wood will be far more receptive to the stain, and this will form the basis for a good quality finish. Do not apply the stain to wet surfaces or if there is a risk of rain or frost.
Filling Holes
Our Wood Stains won’t absorb properly into most ready-mixed or solvent-based fillers, even if labelled as stainable. These fillers are often designed to be coated rather than stained, which can lead to an uneven finish. For the best results, we recommend using a simple white powder filler - the type mixed with a little cold water - as it works seamlessly with our stains.
Sanding the wood
To help create a fine finish, you can raise the grain before the final sanding. Simply dampen the wood with a thin film of water, allow it to dry, then sand again to restore the smooth surface - ready for staining. For the final sanding, we recommend using ‘Wet and Dry’ type abrasive sheets - 120 grit is suitable for most projects. Instead of white spirit, the best way to remove surface dust is with a vacuum and a soft, dry brush.
Shake and mix thoroughly
Some ingredients will settle at the bottom of the bottle. Upturn and shake well for a few moments prior to use, ensuring all sediment is well mixed and the colour of the liquid is consistent throughout the entire bottle.
For some colours, sediment may settle more heavily. In this case, pour half of the contents into a suitable container and replace the cap tightly. Now you can shake the bottle vigorously, ensuring the remaining sediment is fully mixed in. Pour the remainder into the container and stir it all together as one.
Repeat this mixing process prior to each use of the stain to ensure consistent results.
Application
How to apply Wood Stain
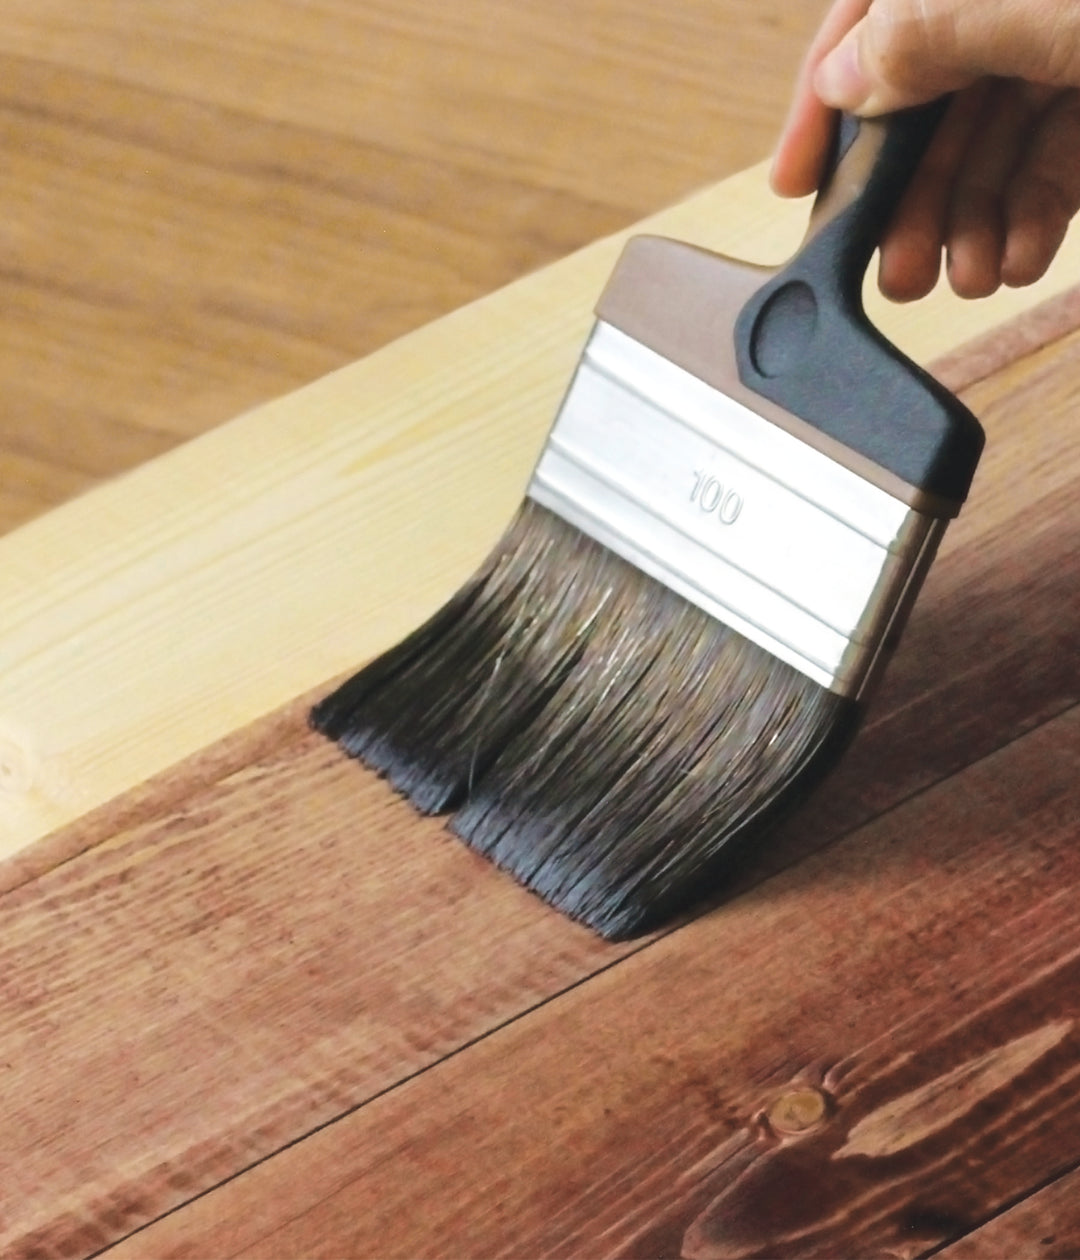
The first coat of stain should be applied liberally along the grain with a good quality brush. Generally, the light colours work best with a single coat. A light second coat or further coats will deepen the shade when applying the darker stains. Work quickly and confidently if you can as this will help you maintain a ‘wet edge’ and avoid overlapping.
Drying times can vary between stains but will typically be touch dry in 1-2 hours in suitable conditions. If you intend to finish your item with wax polish, varnish, oil or clear Titan Topcoat - allow the stain to dry for several hours; perhaps overnight when possible.
Completion
Once dry, the stained wood can be finished with a variety of finishing products depending on the location and desired result.
Danish Oil
Danish Oil will enhance and protect the wood, creating a durable, waterproof finish with a natural look. It builds depth and richness while sealing the surface, making it an ideal choice for both bare and stained wood.
Apply evenly with a good quality brush or cloth. For larger surfaces, the oil can also be sprayed. A light coat will dry quickly, but additional coats are essential to achieve full protection. Allow two to three hours to dry, then gently smooth the surface with a fine abrasive before applying the next coat to ensure a smooth, even finish.
Two coats will provide excellent protection, but when applying over our Wood Stains, at least three coats are recommended for the best results - especially when finishing a darker stain. Once finished, clean your equipment with white spirit.
Worktop Oil
Worktop Oil will nourish and protect wooden worktops, creating a durable, water-resistant finish with a natural, low sheen. It enhances the wood’s grain while sealing the surface against everyday wear, making it ideal for both new and restored worktops. For added depth of colour, it can be applied over our Wood Stains, ensuring they are fully dry before oiling.
Before installation, dilute the first coat with 25% white spirit to aid absorption, then apply it evenly across all surfaces - including the top, underside, and edges - using a brush or lint-free cloth. After 10–15 minutes, wipe away any excess oil before applying further full coats, allowing each to fully absorb before adding the next. The more coats applied before installation, the better.
After installation, additional coats can be applied to the top surface and edges for added protection, paying particular attention to areas exposed to heavier water use, such as around sinks. When finished, simply clean your equipment with white spirit. Over time, reapplying the oil will help maintain the worktop’s durability.
Extra Strong Varnish
Extra Strong Varnish will provide a tough, durable finish that protects indoor woodwork from everyday wear. This water-based formula strengthens the surface while offering long-lasting protection, making it ideal for use over our Wood Stains.
Before use, upturn and shake well for a few moments to ensure the varnish is thoroughly mixed. Apply the first coat with a good quality brush, working along the grain with light strokes. Once dry, gently smooth the surface with a fine abrasive before applying the final coat. Remove dust with a dry brush, moist cloth, or sponge.
During prolonged use, periodically clean your brush with cold water.
Titan Topcoat
Titan Topcoat is a multipurpose, low-odour, and quick-drying waterproof coating that provides a tough, non-yellowing finish. Designed for use on most types of wood and sheet materials, it delivers superior robust protection ideal for high-use areas - especially when applied over Littlefair’s Wood Stain.
Before use, stir well to ensure it is thoroughly mixed. Apply evenly with a good quality brush, roller, or applicator pad, working quickly and confidently to avoid overlapping. For larger surfaces such as doors, floors, and tabletops, dilute the first coat with approximately 20% cold water and apply a thin basecoat.
Once the first full coat has dried, it can be lightly sanded with 240 grit abrasive if needed. Alternatively, you may prefer to build up multiple coats before sanding, only smoothing the surface before the final application. For a neat finish, ensure the last brush stroke follows the grain.
When finished, simply rinse brushes and equipment thoroughly with cold water.
Wax Polish
Wax Polish will enhance and protect indoor woodwork, creating a deep, lasting shine. Our blend of environmentally friendly, low-aromatic waxes makes it easy to apply, quick-drying, and buffable to a natural sheen.
For best results, apply two to three coats using a paintbrush for detailed areas and a cotton cloth to smooth the wax and prevent streaks. Allow each coat to dry for around an hour before buffing with a clean cotton cloth.
Used alone, our Wax Polish will seal and protect the colour of stained wood. It can also be applied over any of our finishing products for added durability and a soft, tactile feel.
It’s important to note that the final appearance will be a combination of the natural colour of your wood, the effect of the stain and the finishing product if used. With this in mind - always produce a test piece in the same manner as your project so you can properly judge the result.